
For this task you were given a memory capture from one of the MQTT agents. You needed to identify the PID of the malicious process, the attacker’s MQTT topic, and the attacker’s C2 HTTP server. The server could change IP address so you had to find some other identifying information. Below is a template of the commands I ran, X is which command to run.
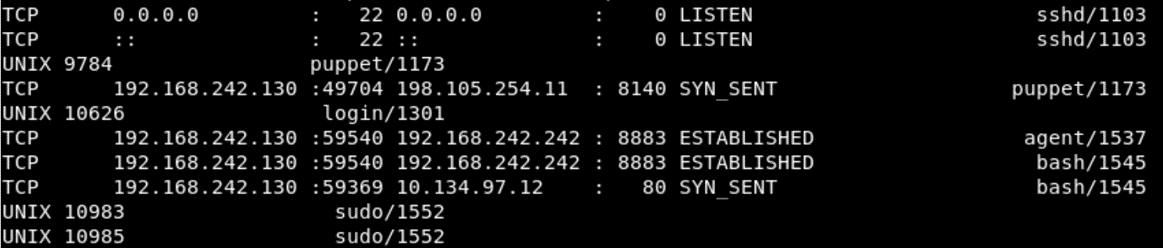
volatility --plugins=/usr/share/volatility/profiles --profile=Linux3_13_0-128-generic-volatilityx64 -f /root/Desktop/codebreaker/agent.lime XI used volatility with the image profile they provided to explore the memory capture. My first step was to run linux_netstat to get the current connections. From this I saw a PID connecting out to a HTTP server. A connection was being made to IP 10.134.97.12 on port 80, by PID 1545.
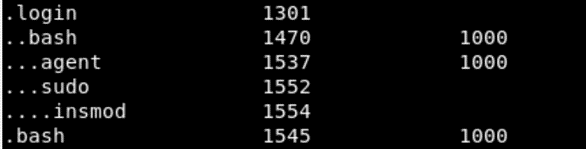
Running linux_pstree then gave me the process name of the program that made the connection.
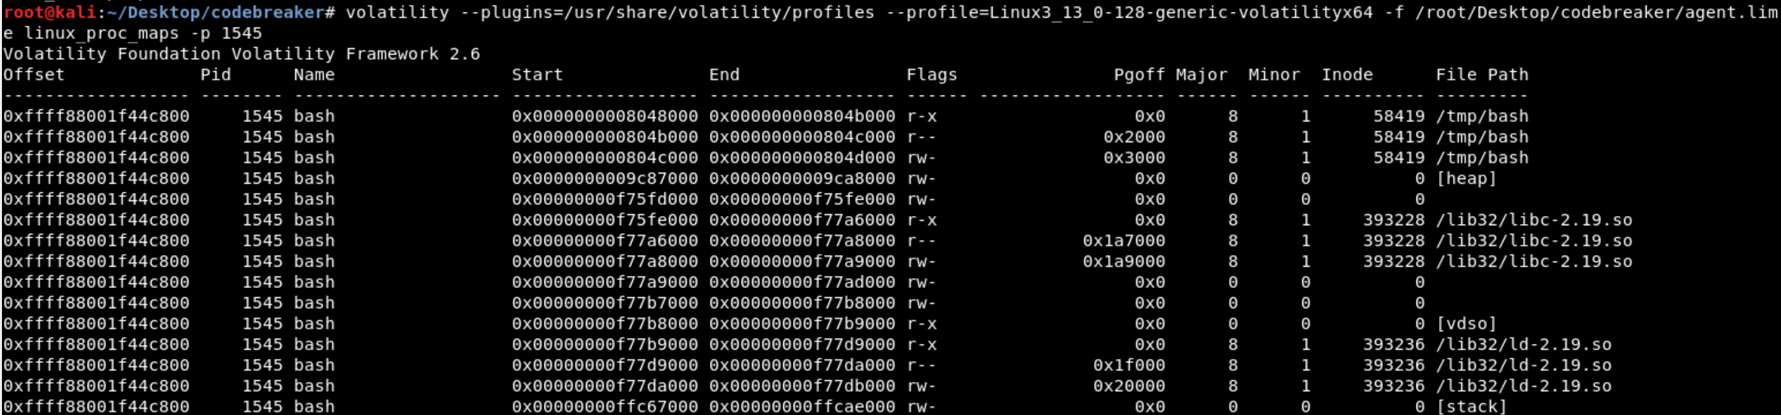
Running linux_proc_dump shows the file path of the bash binary which is /tmp/bash, this is not a normal location for a executable. This comfirms that the PID of the malicious process is 1545.
The next objective was to find the attacker’s MQTT topic. The agent’s memory should still contain this information since it recently handled the message. The PID of the agent was 1537. The process memory was dumped using linux_dump_map, and linux_proc_dump was used to determine which one contained the process’ heap.
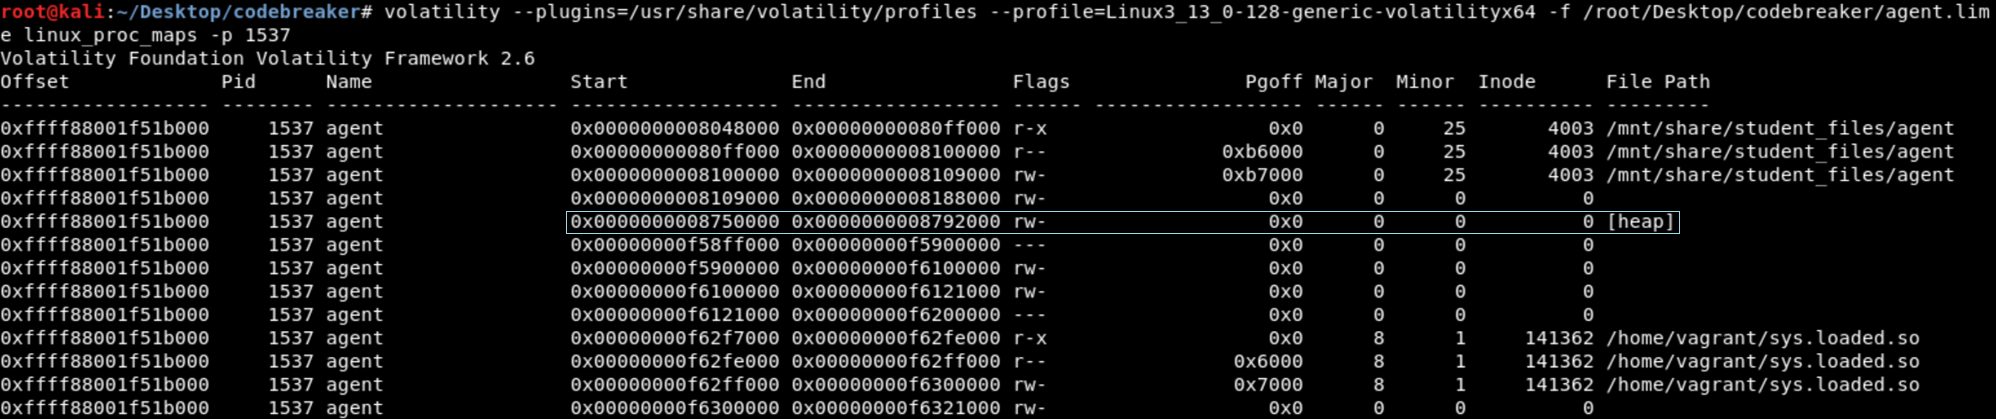
From task 4 we know the topic has to contain MODULE in it. Running “strings task.1537.0x8750000.vma | grep MODULE” returns the MQTT topic codebreaker/MODULE/sys_16575f98/nodes-15411b7b.
The last task was the hardest for me, because I made a mistake and it took me a while to recover from it. For this part a identifying piece of information needs to be found within the /tmp/bash executable. To retrieve the the binary linux_procdump or linux_find_file can be used. The command linux_find_file will retrieve the executable as it is stored on the filesystem. The command linux_procdump will dump the executable from memory which may include additional information.
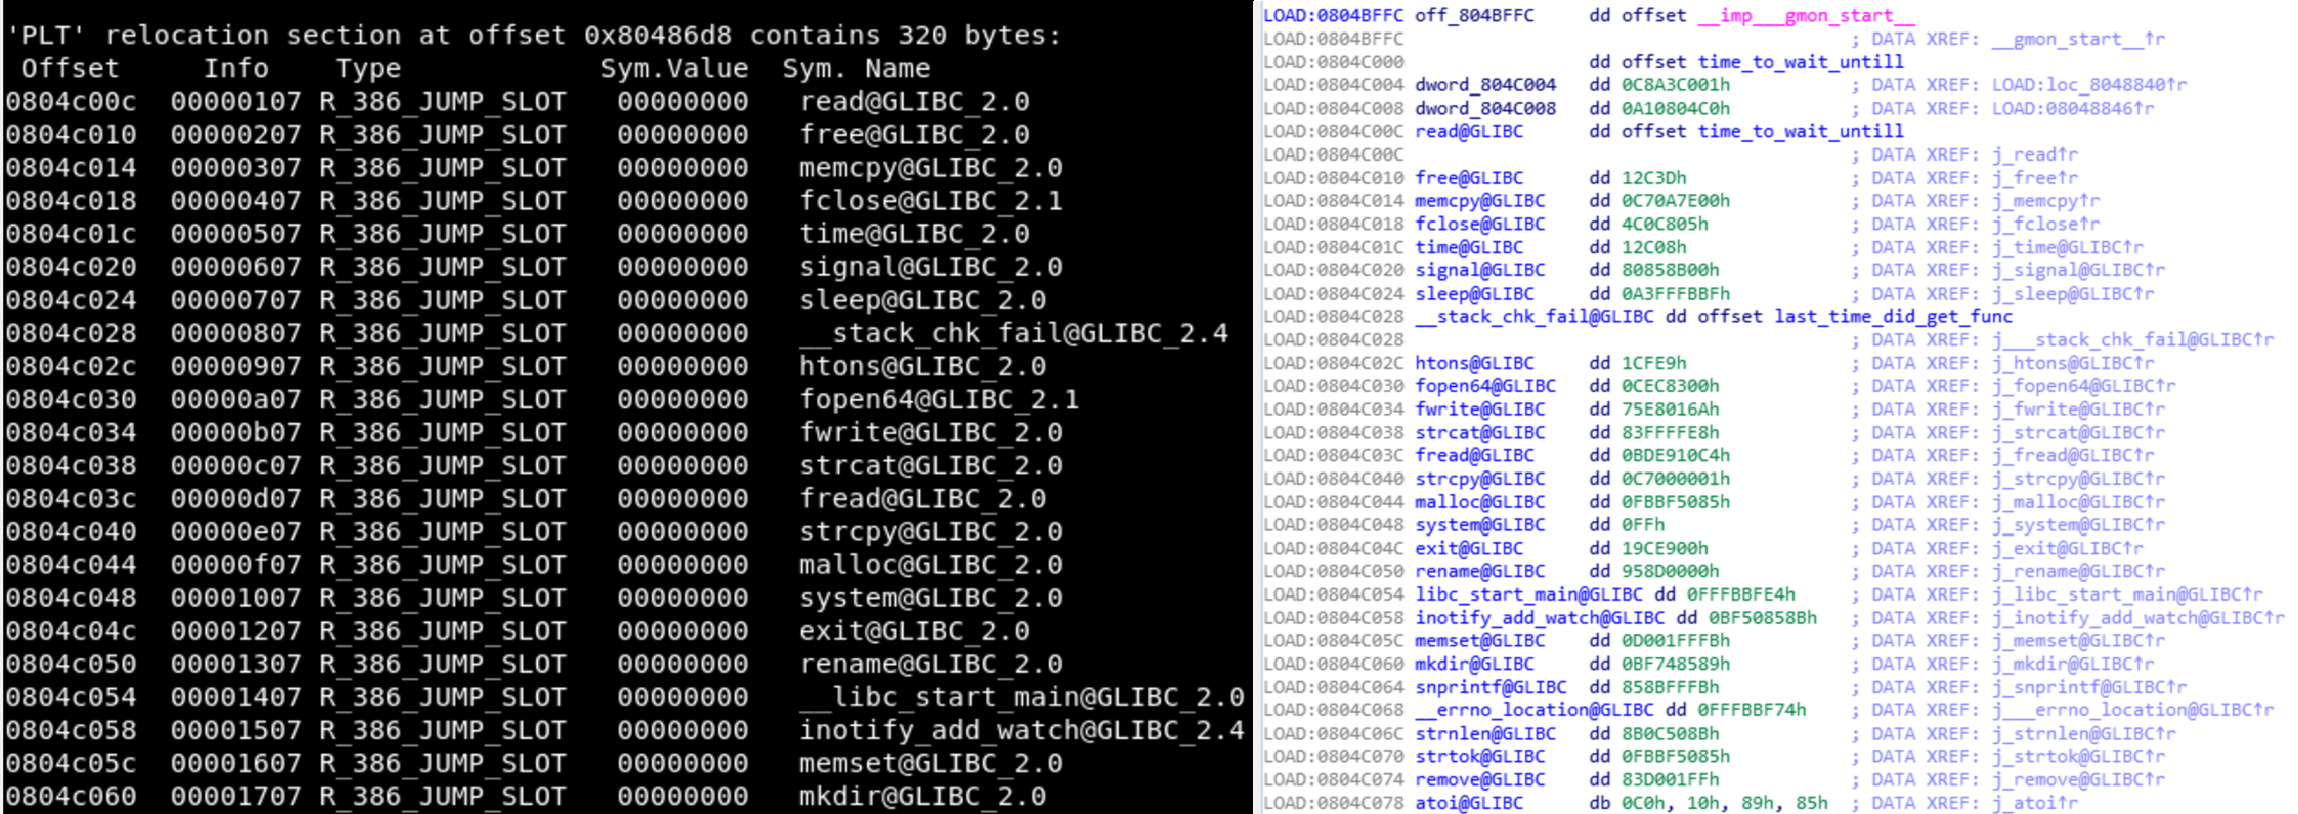
When the executable is opened in IDA there are multiple functions that just jump to a location loaded in the binary. To determine what functions these are the command “readelf -D -r bash” can be used. This will reconstruct the Procedure Linkage Table (PLT), this will make reversing the binary much easier.
To quickly determine find out where the binary makes a network connection, the strings table can be searched for HTTP headers.
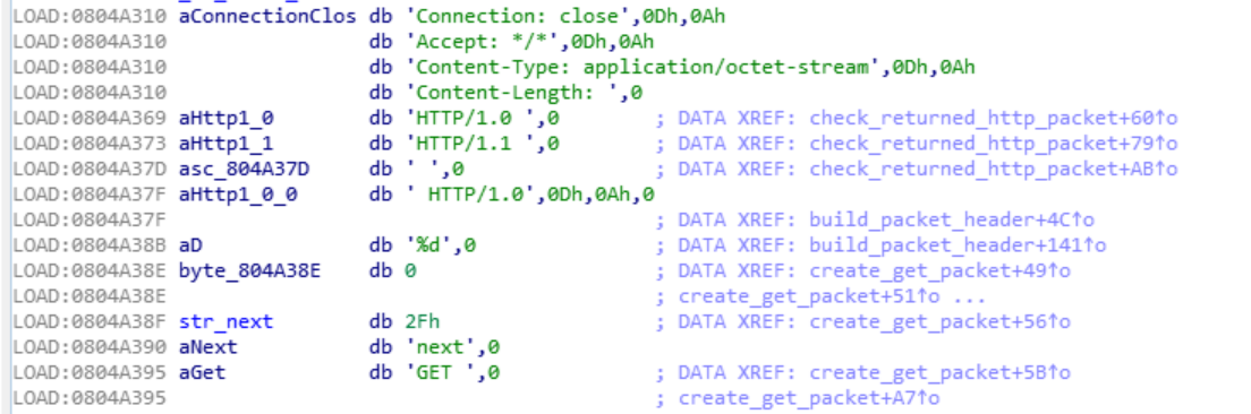
By following the reference to the string HTTP/1.0 “ I found a function that appears to be checking the message returned by the server.
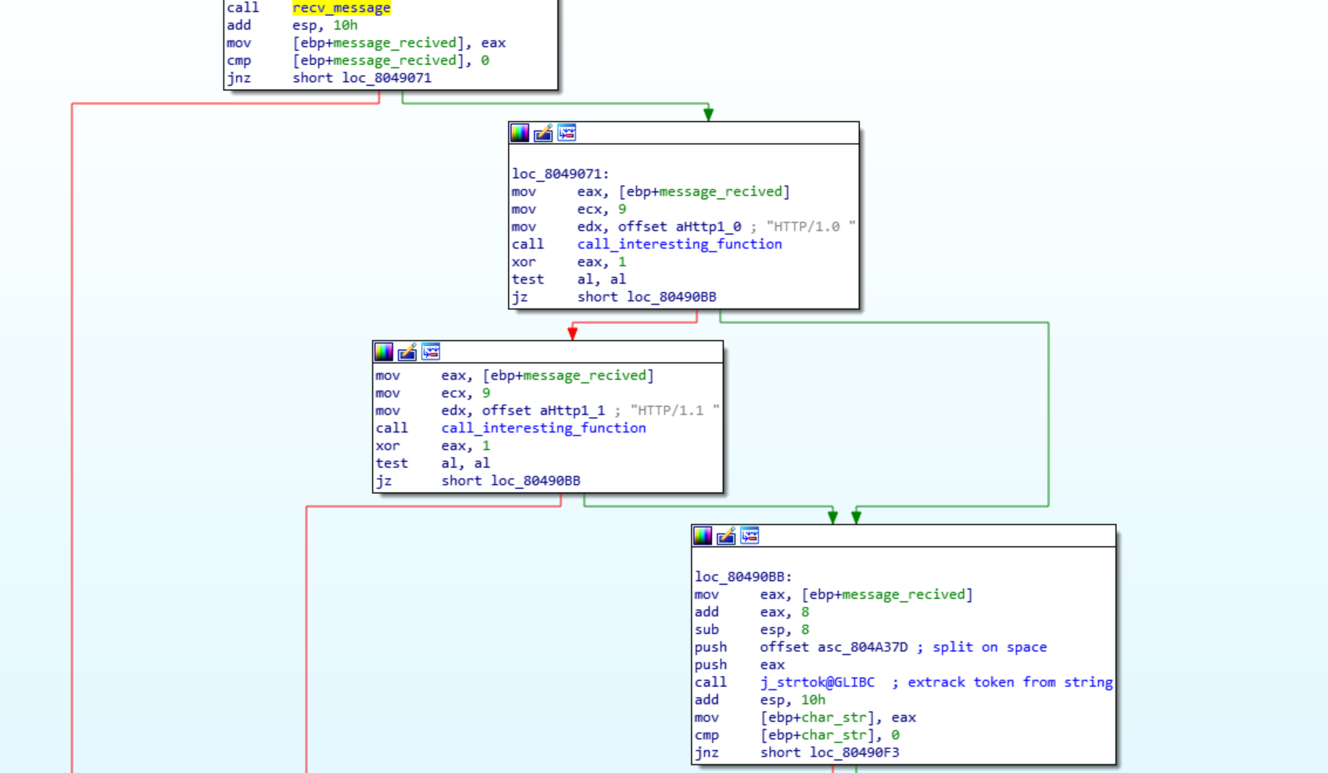
Taking a quick look at it I identified an array of bytes loaded onto the stack that are then passed to a dynamically resolved function. This seemed unusual and could be what I was looking for. A dynamically called function is called that is doing something with that string and the return from the server.
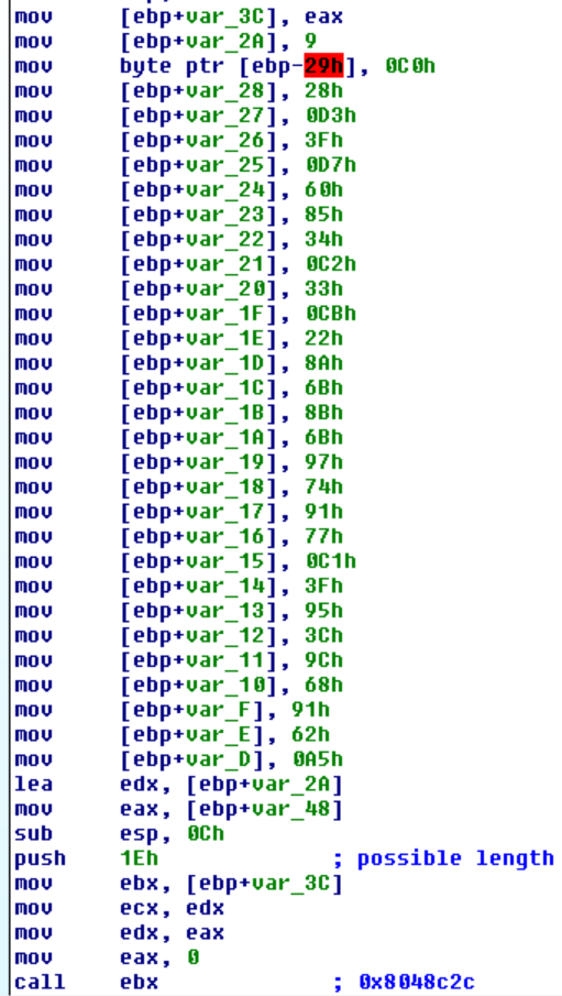
This appeared to be what I wanted, so the next step was trying to figure out what function is being used. The arguments passed and the return value seem to be unique and so I searched through the functions IDA identified until I found one that matched. Since the stack string looked like it was obfuscation I tried XORing each byte with 1-255 to see if the result was readable, but didn’t get anything.
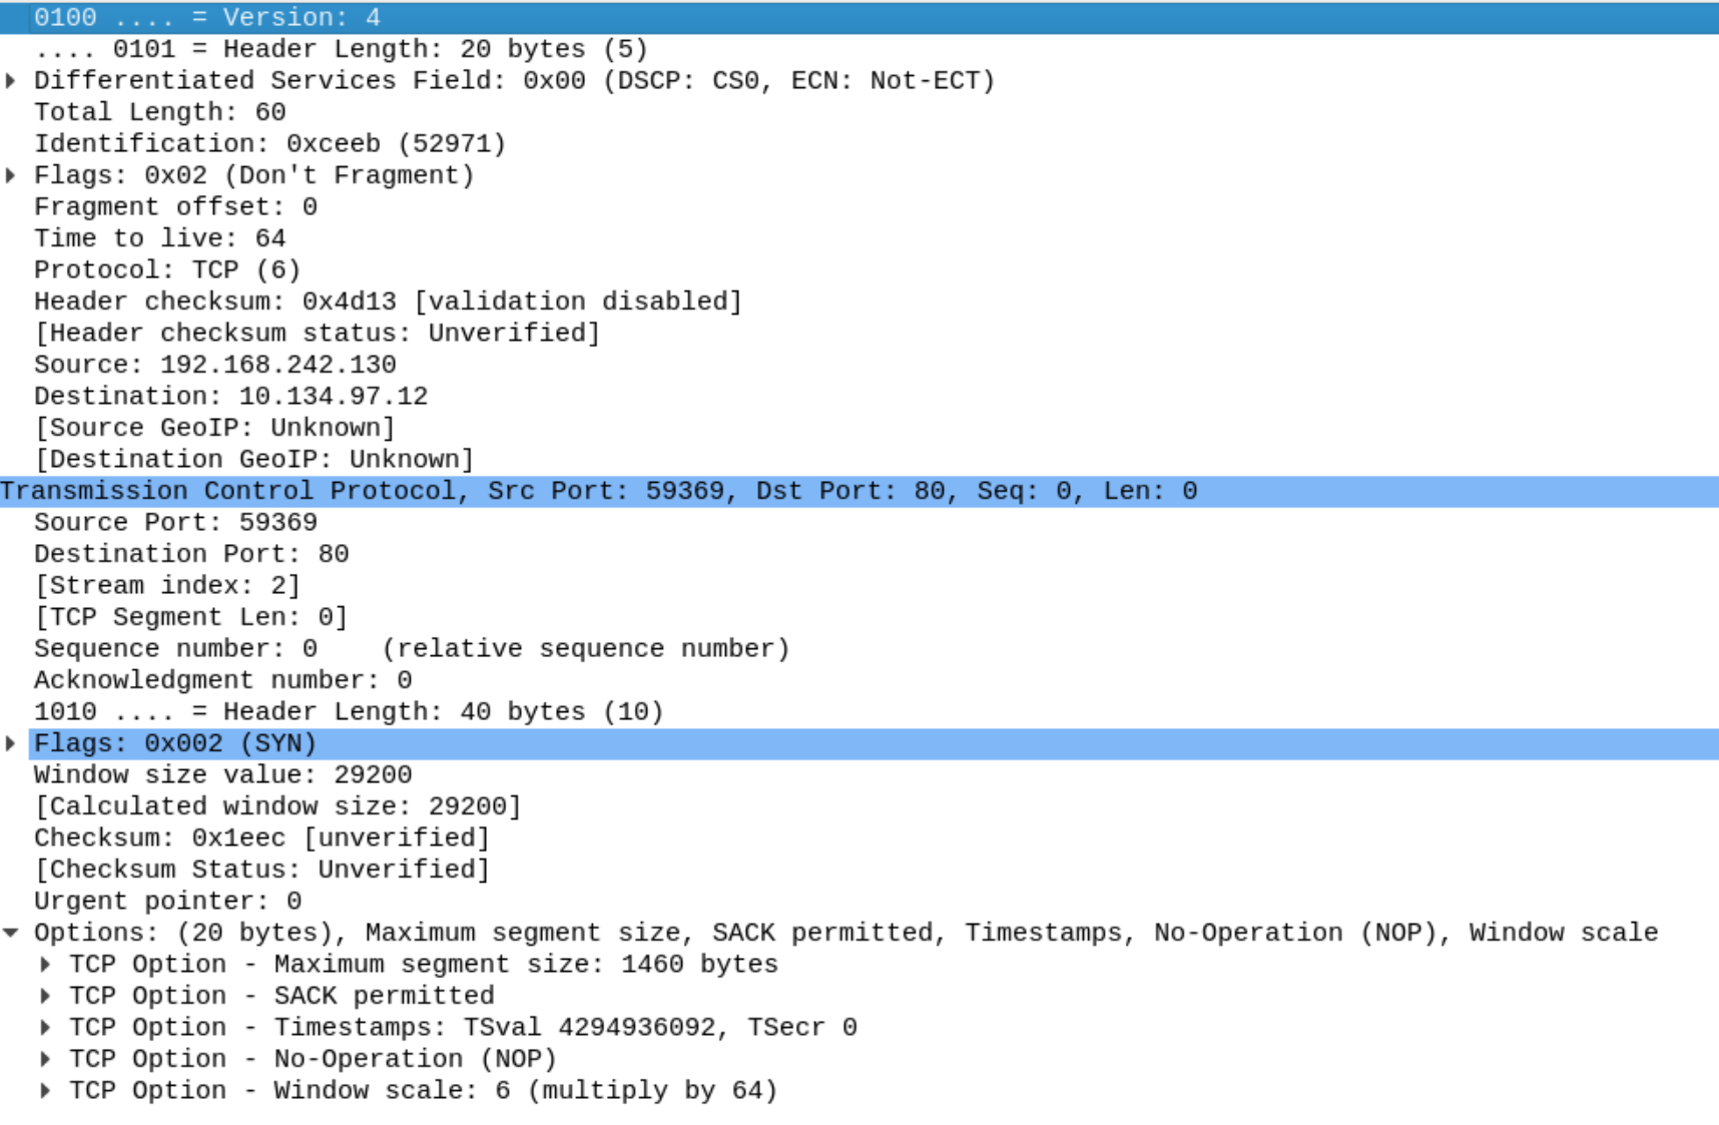
This function seem to be checking the arguments passed in. The only problem was that the data on the stack was non-printable characters and everything in the HTTP header should be readable. This should have been my hint that this was not the right function. This was the only function I could find that had the right signature and I got stuck on this being the correct function. I decided to check to see if there was any other things that could be used to identify the server. I used bulk_extractor to scan the memory capture for network packets, that I then opened in Wireshark. Below is the SYN packet sent to establish a connection with the server.
I also opened the process stack and found the return addresses to get the call stack. White boxes are the return address, red are arguments, and blue are local variables. The local variables and function arguments can give context to the code seen in IDA.
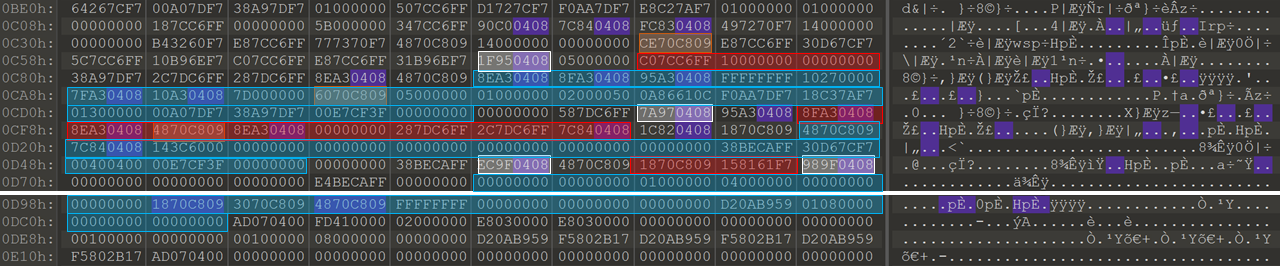
Program flow from stack
- return from create_get_packet to 0x8049fec in start_func
- return from build_packet_header to 0x804977a in create_get_packet
- return from connect to 0x804951f in build_packet_header
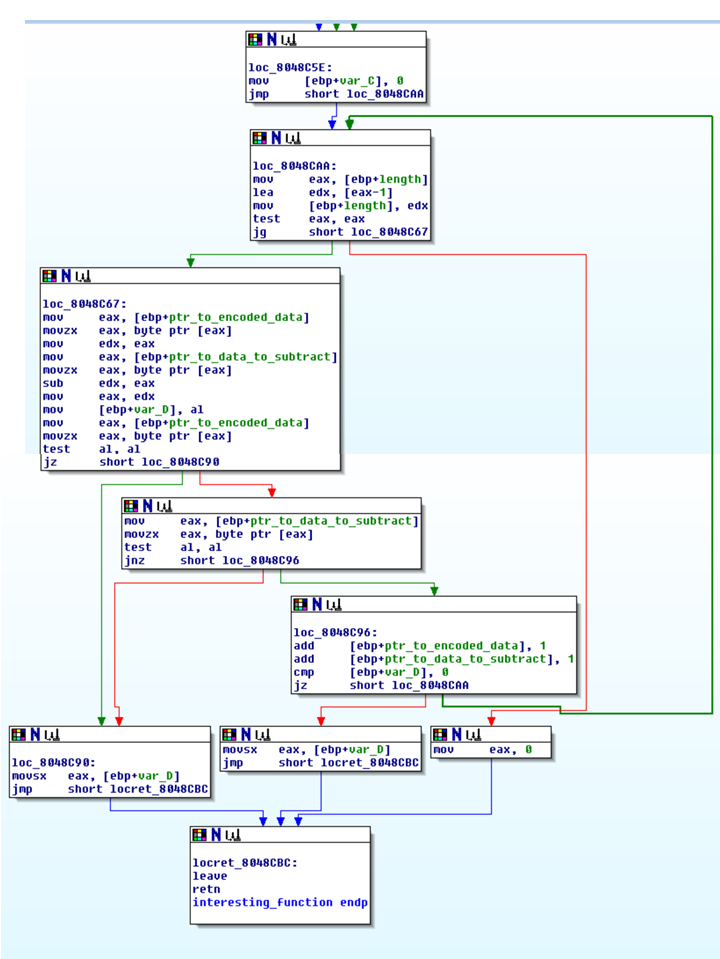
After research online to find anything that can be used to identify a server, I wasn’t able to find anything new. I then remembered that IDA Pro will only add a function to the function list if that function is called. Scanning the disassembly a function that was not called, but was dissembled was found that matched the signature at 0x8048cbe.
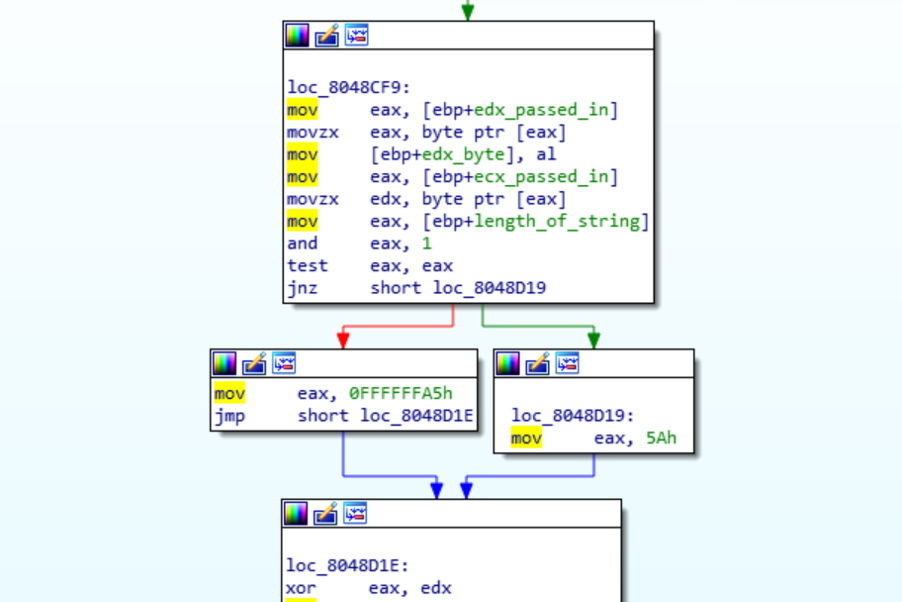
This function will XOR each byte passed in with either 0x5a or 0xa5 depending on the position in the string. Looking back at the result From XORing with 1 byte, I saw that I had decrypted every other char, but I had missed it since it wasn’t completely readable.
Below is the decryption script written in python.
hex_string = ['9', 'c0', '28', 'd3', '3f', 'd7', '60', '85', '34', 'c2', '33', 'cb', '22', '8a', '6b', '8b', '6b', '97', '74', '91', '77', 'c1', '3f', '95', '3c', '9c', '68', '91', '62', 'a5']

def unscramble(toggle, c):
    if toggle:
        return chr(0xFF-0x5A^c)
    else:
        return chr(0xFF-(0xA5^c))

for x in range(0, len(hex_string)):
print unscramble(x & 0x1, int(hex_string[x], 16)), 
After submitting the server name, task 5 was complete.
